What? Another post already? Yes, indeed! Because I did a new project recently, and actually took progress shots the whole way through! Also, I revamped my blog a bit, so let me know what you think of the new look. Anyway, on to the project!
When the Goofer Bean was a baby, I made her three special dresses for her first year of life-- a Christmas dress, a birthday dress, and another holiday dress (for her it was Thanksgiving)-- and I wanted to do the same for Fluffernutter. I made her a
Christmas dress right away, then planned to make her next dress for Easter. Handsomeface and I closed on our house in February, though, and had to be out of our apartment by the end of March, and so, with much sorrow and a few tears, I had to change plans. Michael suggested that we have a housewarming party once we got moved in, and maybe that could be a good occasion for a special dress. He was totally right, so I started looking on Pinterest for inspiration.
I've been interested in getting into hand embroidery for quite a while, and several months ago, I did a little internet research into smocking. I thought this might be a good time to look into it again. It seemed complex and and time consuming, but simple enough to be a good way to start into embroidery. I chose a couple of patterns, then picked fabric and thread. I did a little more research, watched some great
tutorials by a lady named Laurie Anderson, and got started.
 |
Pattern by Creations by Michie, smocking plates by Cross Eyed Cricket
and Ellen McCarn, and fabric by Gretchen (Gertie) Hirsch |
 |
| The fabric, cut out and ready to go! |
The first task was to stitch the shoulder seams, which was easy enough. Then I needed to pleat the fabric. Smocking requires smooth, even pleats, so I started with guidelines, as suggested by the pattern. I checked and double checked the measurements the pattern gave, then used a water soluble pen, ruler, and seam gauge to draw a hundred jillion lines. It took hours, but hey, I needed to get this done right, right?
 |
| This took soooo long. |
Next, I used those guidelines to make eleven rows of 1/16" stitches, all by hand. Most people use a pleater, but those cost hundreds of dollars, and I don't spend hundreds of dollars on first attempts. It took at least a week.
 |
| So many stitches... |
The next task was to gather up the pleats and starch and steam the neckline into shape, also known as blocking. It was 11 PM a week before our housewarming party and was feeling proud and optimistic... until I tried to gather up the pleats. I rinsed out my guidelines so as to avoid setting the ink when I steamed the dress, then started pulling up the pleats. Instead of folding neatly, though, they bunched and clumped and poofed. According to all the photos and tutorials I'd looked throughout the project, it was wrong. All wrong. I searched and searched the internet (there's not a lot of info on hand-pleating for smocking, surprisingly enough), and finally came to the conclusion that my pattern was wrong. The vertical guidelines that it told me to draw 1/8 of an inch apart should have been drawn 1/4 of an inch apart. Oh, it was bad. It was so bad. I couldn't see how I'd ever get the house clean, get all the food ready, and redo hours of work to catch up the progress I'd lost on the dress, much less finish it, all in less than a week. I cried, I swore, I threw the dress on the dirty kitchen floor, and then I stalked up the stairs and crawled into bed.
 |
| Back to the drawing board. |
After talking to Michael (and crying so much more), I felt a little bit better. I simplified my plans for party food, and alternated cleaning chores with redrawing guidelines and re-stitching pleats. The upside was that, since there were half as many pleats to be done, it took half the time, but I still didn't plan to finish in time for the party. That ship had sailed, or so I thought.
 |
| Guidelines 2.0 |
 |
| Pleating stitches finished, for real this time |
Finally I was ready to block the dress, for real this time. The new pleats pulled up beautifully. I found it a little tricky to get them all evenly arranged and pinned, but it was fun to spray starch the whole thing solid! And I was so pleased to finally be actually doing it!
 |
| All lined up and ready to go! |
Once the spray starch dried, I was finally ready for the fun part- the actual embroidery. I still thought it would take much more time than I had, but I'd chosen this because it looked fun, so at this point I was planning to have that fun and finish when I finished. I got started and found it to be easier than I'd expected, which was a pleasant surprise.
 |
| Ready to embroider! |
 |
| The first few rows. |
By now, it was Friday, two days before the party. I'd asked my mom to come watch my kids while I bought the food I needed, and she also offered to help me finish cleaning the house (she likes to clean, and boy, is she good at it. I was planning to clean along with her, but she'd seen my despondent Facebook post about the whole pleating mess earlier, and she let me sit and embroider when I wasn't off shopping. I started feeling weirdly optimistic again. She came again the next day, and I managed to finish the embroidery by that evening! It was actually looking like I'd get to finish the dress in time after all!
 |
| Making progress, row by row. |
 |
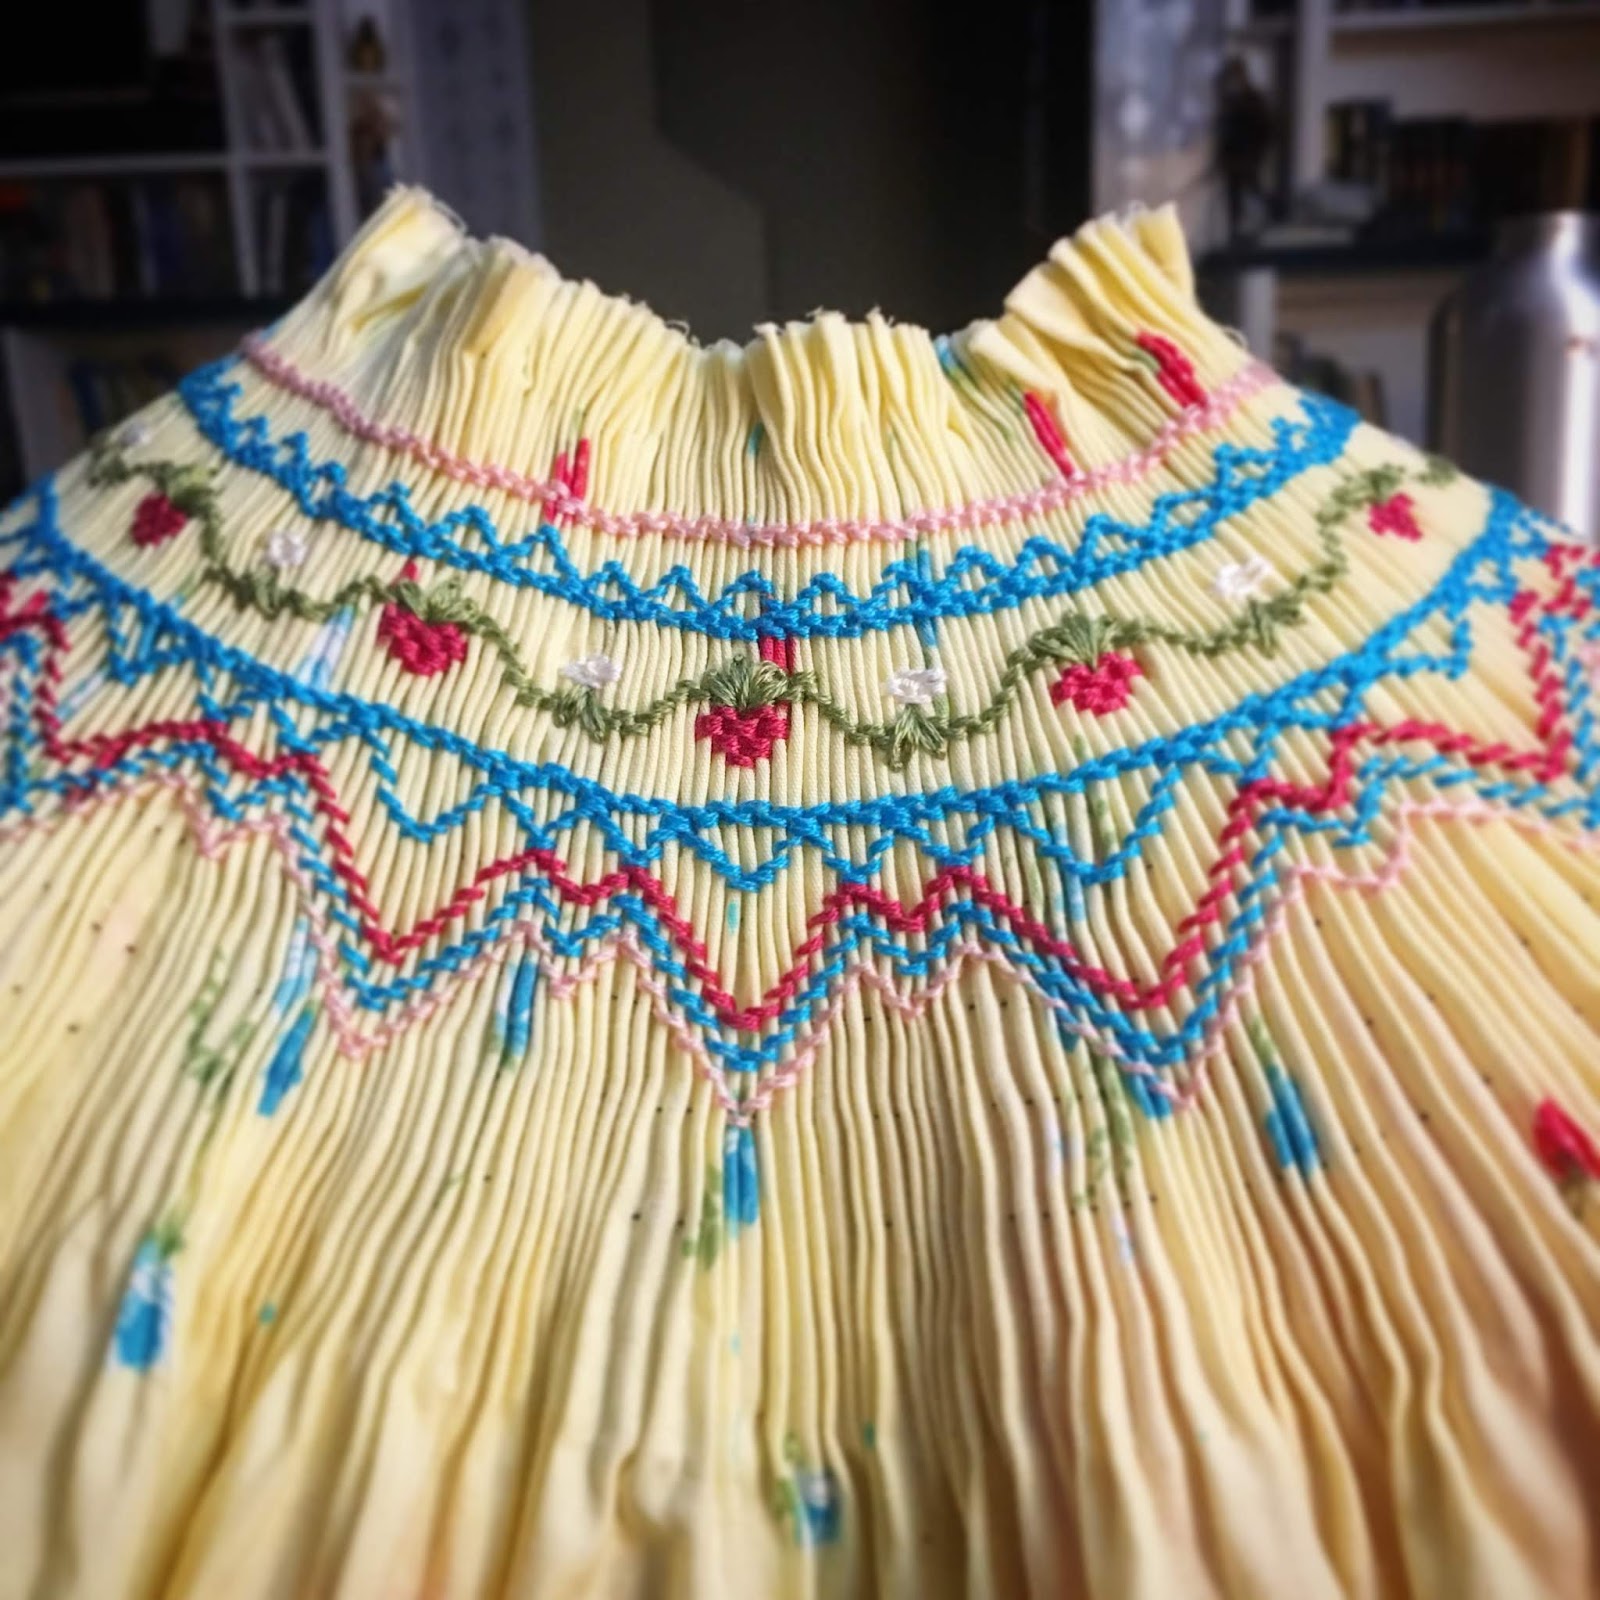
| All the embroidery, finished! |
That night, I stayed up a little later than I'd planned (and by that I mean I was up till 2 AM) finishing the last machine sewing-- sewing the side and back seams, attaching a back placket and sewing on neck and sleeve bindings, though I'd have to finish those bindings by hand. I also removed the pleating threads, found the cutest little buttons for the back, and packed everything up to finish the next day.
The next day was the day of the party. I took the dress with me to church and managed to finish the neck binding and one of the sleeves. At home I finished the other sleeve and blind-hemmed the skirt. The last step was to make button loops and sew on the buttons. When those were done, I threw it (well, very gently placed it, actually) in the washing machine to get the last of my guidelines out. A few guests arrived before it was done in the dryer, but not too long after the party started, Fluffernutter was in her dress, and looking cuter than ever, and I even had time to bake a fancy cheesecake besides! What a triumph! I'll devote my next post to the photos of the finished dress, so keep an eye out for that. Thanks for reading!


No comments:
Post a Comment